Client-Server or Server-Server type of applications are required to establish Two-way SSL with the SEI API Platform.
An Application consuming SEI APIs needs to be implement one of the following standards based on their use case:
| Application Type | Actor | SEI Security Standard |
|---|---|---|
| Client-Server/ Server-Server | Server |
OAuth grant_type= client_credentials Two way SSL Must use service accounts Use port 444 |
| Client-Server | End User |
OAuth grant_type= Auth Code for SEI clients OAuth grant_type= Password for SEI Internal Apps |
| Single Page Web Apps | End User |
OAuth grant_type= Implicit |
| Native Apps | End User |
OAuth grant_type= Auth Code with PKCE |
Legend: Actor in this context means a human or non human user driving the API interaction decisions via the application.
The SEI API Program uses OAuth 2.0. OAuth 2.0 is the industry-standard protocol for authentication and authorization.
The application intending to consume SEI APIs needs to authenticate and obtain an OAuth before invoking any functional APIs to retrieve data.
Refer to the OAuth section in Getting Started for more information.
SEI API Program uses OAuth 2.0 authorization framework enhanced to meet SEI Security requirements.
The specification describes multiple workflows/mechanisms through which the end user or the client application are challenged for their credentials to perform validation before returning data.
While the specific workflow is governed by many factors the general theme is to impose a more challenging workflow where the risk is deemed higher.
Below flow describes which grant_type can be used based on the application interacting with the APIs:

Two Way TLS is required for server based applications in order to integrate with SEI APIs. An identity certificate with the CN matching the service account username is needed to facilitate Two Way TLS.
If the client selects a SEI cert during the Application registration process, SEI will provision the certificate using trusted parties such as Trustwave or Entrust and provide it to the client.
The SEI cert download link and instructions is valid for one download. If the cert has not been downloaded and the link expires, please contact SEI and we can issue a new link. The SEI cert will expire after 2 years. The client will be notified ahead of the expiration time about requesting a new cert to avoid production issues.
1. DO NOT USE Google Chrome to download the certificate. Use Internet Explorer if possible. You may encounter challenges with using Chrome to download the cert when it comes to installation.
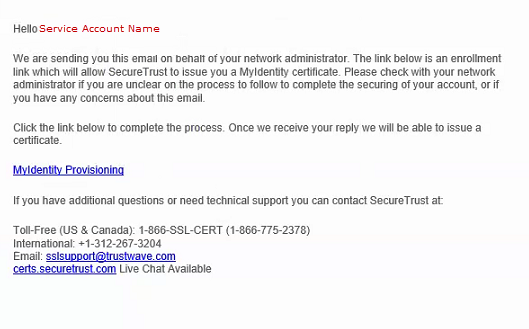
2. The email address associated with the application in the SEI Developer Portal will receive an email similar to the below, which provides a link to download the certificate. NOTE: The link expires after the first download attempt.
Install OpenSSL (If already on your computer, skip this step)
1. You will need open ssl installed on the machine you will use to extract the .pfx, .crt, or .key files
2. Go to: https://sourceforge.net/projects/openssl/
3. Complete OpenSSL instructions.
Certificate Extraction Instructions – Windows
4. Once the client receives the email from Trustwave, download the client certificate from the Trustwave Portal.
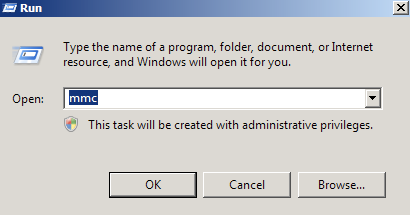
5.Create an MMC Snap-in for Managing Certificates on the first Windows system where the SSL certificate is installed.
- Start > run > MMC
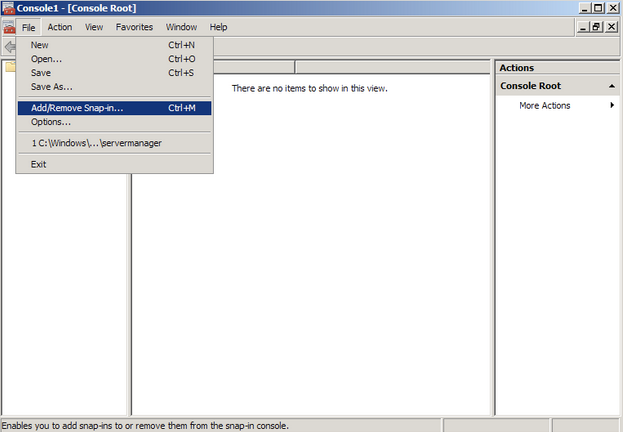
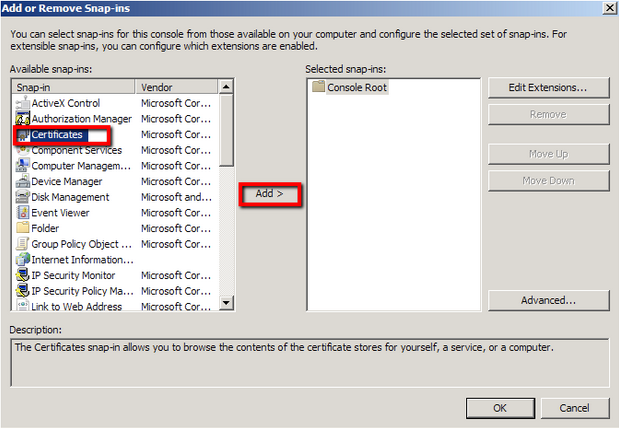
- Go into the Console Tab on the server, then navigate to File > Add/Remove Snap-in
- Click on Add > Click on Certificates and click on Add
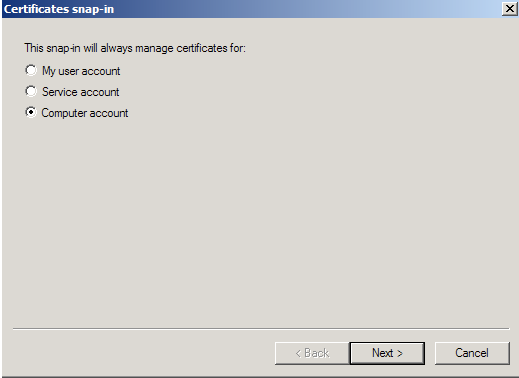
- Choose Computer Account > Next
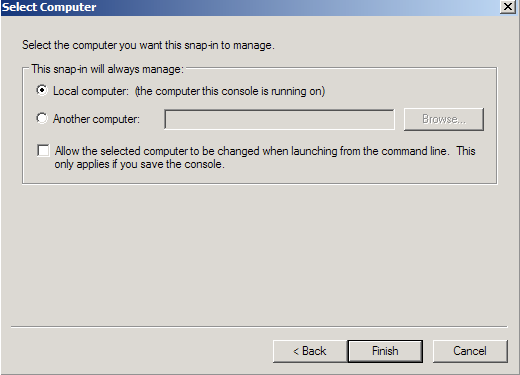
- Choose Local Computer > Finish
- Close the Add Standalone Snap-in window.
- Click on OK at the Add/Remove Snap-in window.
6. Export/Backup Certificates to .pfx file
- In MMC Double click on Certificates (Local Computer) in the center window.
- Double click on the Personal folder, and then on Certificates.
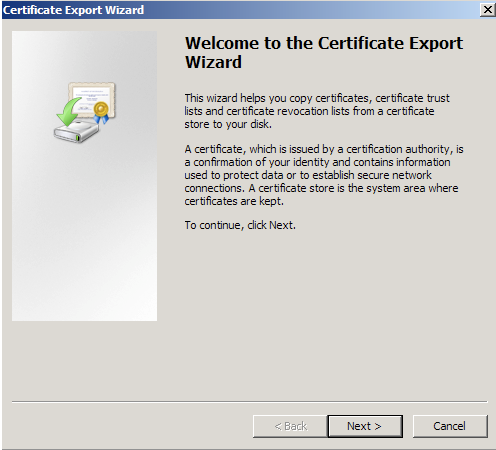
- Right click on the Certificate you would like to backup and choose > ALL TASKS > Export
- Follow the Certificate Export Wizard to back up your certificate to a .pfx file.
- You will receive a message > “The export was successful.” > Click OK
- Download .p7s file from TrustWave.
- Open Applications>Utilities>Keychain access
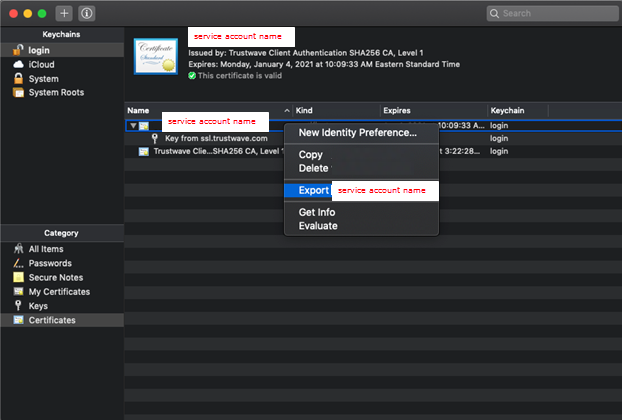
- Click the “+” sign on the top left corner and import the .p7s file
- You should now see two line items, one contains a certificate and key pair, and the other contains the intermediate certificate
- Right click on the certificate and click “Export” (You have the option of providing a password or not, completely at your discretion)
- Repeat the same export for the key
- You should now have two .p12 files (one certificate & one key)
- Run the following commands to convert those .p12 file to the appropriate file:
openssl pkcs12 -in certificate.p12 -clcerts -nokeys -out certificate.crt
openssl pkcs12 -in privatekey.p12 -nodes -out privatekey.key –nocerts
- Use those files to initiate an SSL connection.
After completing these steps the .pfx file backup is now saved in the location you selected during the aforementioned process and is ready to be moved or stored for your safe keeping.
You can import the PFX file into your application environment based on the OS used. Please see below import methods
- Windows/IIS – Import PFX file using Certificate wizard (MMC)
- Linux/Java – openssl commands or Keytool to import
Provided you have installed OpenSSL, execute the below commands.
Additionally, check out one of the 2 links for detail instructions:
Commands:
openssl pkcs12 -in [yourfile.pfx] -clcerts -nokeys -out [certificate.crt]
openssl rsa -in [keyfile-encrypted.key] -out [keyfile-decrypted.key]
Links:
https://www.itsupportmiami.com/how-to-convert-a-pfx-to-a-seperate-key-crt-file/
https://support.securecdn.stackpath.com/hc/en-us/articles/230841967-Converting-pfx-to-a-crt-key-files
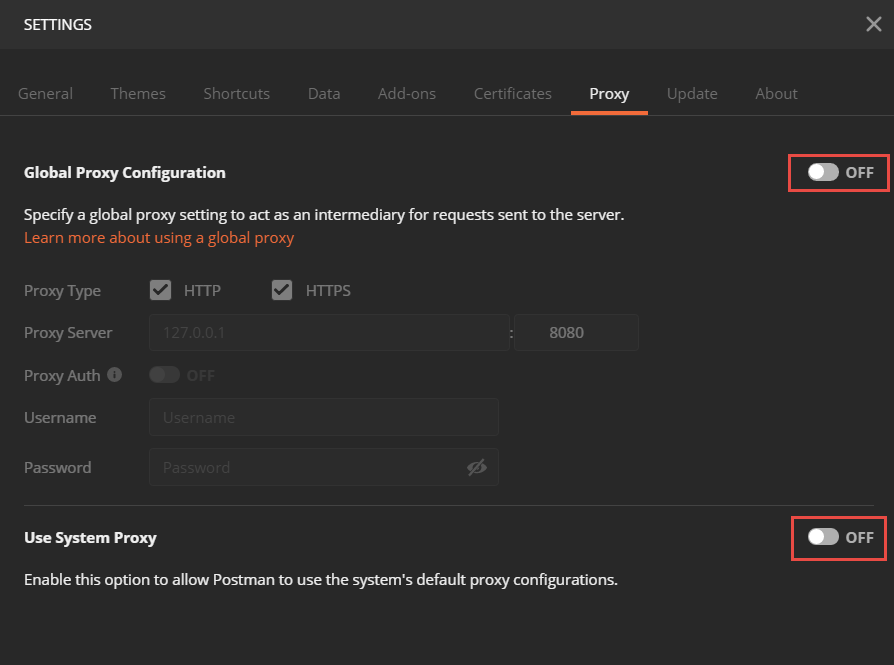
Make sure you are using .crt and .key files instead of a .pfx file when invoking calls from Google Postman. Check your Postman Settings in the top right hand corner of the console.
Verify that under the certificates tab, the Host, CRT File, KEY file, and Passphrase are all correct.
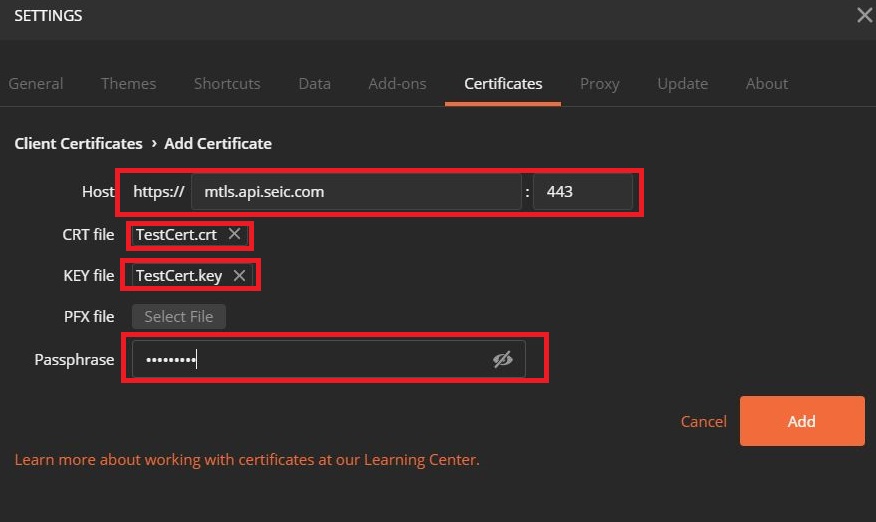
Also check the Proxy tab and confirm both the Global Proxy Configuration and Use System Proxy settings are OFF.